Vegetarian Fajita Tacos

DSC_0205_01

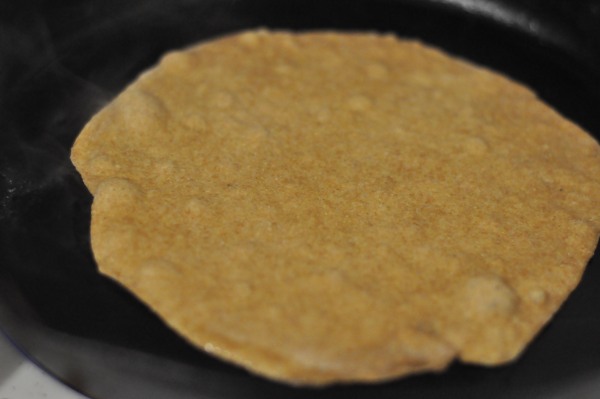
These are using my Whole Wheat Protein Tortillas I posted earlier.  I was originally not going to post this because I felt like it was just vegetables in a tortilla, but Justin said people like recipes.  I guess I trust him.  We’ve been together for a while now, I think I owe him that.

Recipe:

2 white onions (sliced, caramelized) 
1 red pepper (sliced, roasted)
1 green pepper (sliced, roasted) 
3 jalapeno or serrano peppers (diced, roasted) 
1/2 cup corn
1 15 oz can black beans (or 1.5 cups cooked beans)
1-2 tsp oil
salt

Toppings:

Greek yogurt
salsa
avocado
lettuce

First we’re going to slice our onions.  People get all weird about onions.

They’re like, “No, I’m going to cry.”

And, “Oh my god, my breath.”

I read all sorts of forums about people complaining about onions and crying all that stuff.  People come up with the silliest solutions to avoid this problem — goggles, freezing the onion, soaking the onion in water, cut near a flame.

Silly business.

When you cut into an onion you’re breaking cell walls, inside those cell walls is a chemical compound called sulfoxide which is basically sulfur and oxygen bonded together with other compounds.  When we cut into an onion we release this and it turns into sulfuric acid, which then stimulates the tears in our eyes.  Mind you this is a bastardly simplified version, but enough for these purposes.  Anyway, the majority of the sulfoxides are contained near the root of the onion.  So if you leave the last 1/2 inch of the onion alone and cut with a sharp knife (which disrupts less walls) 9 times out of 10 you won’t have tears and chances are your breath won’t smell.

So quit your bitching and cut your onion.

DSC_0108_01

Leaving the root on, cut the very top of your onion of after you’ve halved it.  Make slices through your onion, making sure not to disrupt that last 1/2 inch.

image03

hyperink.com

Here’s a diagram.

DSC_0109_01

Then slice the root off.

DSC_0110_01

No tears!

And no freezing, flames, or goggles.

DSC_0115_01

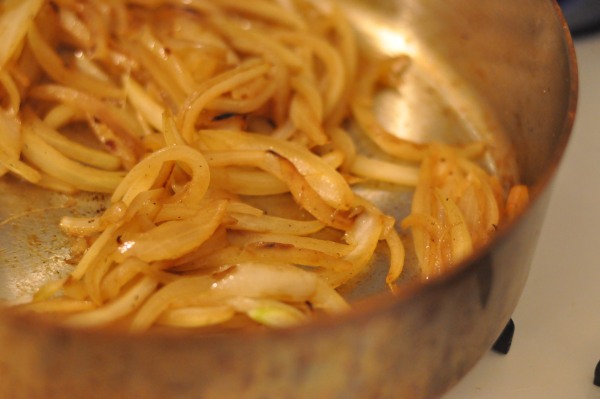
Now we’re going to caramelize our onions.  This is a process.  Any person writing a recipe that tells you you can caramelize an onion in 5 or 10 minutes is a damn dirty liar and is never to be trusted again.  It takes minimum 30 minutes, but longer is always better.

Add 1-2 tsp oil to a pan and heat over medium heat.

DSC_0117_01

Add your onions and salt.  Cook over medium-medium high heat.  Don’t stir too often or you’ll prevent caramelizing.

DSC_0118_01

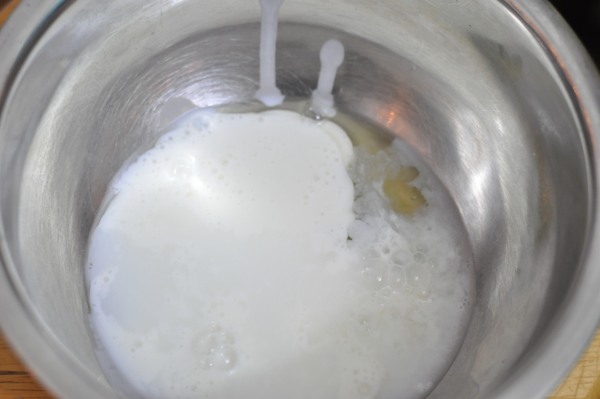
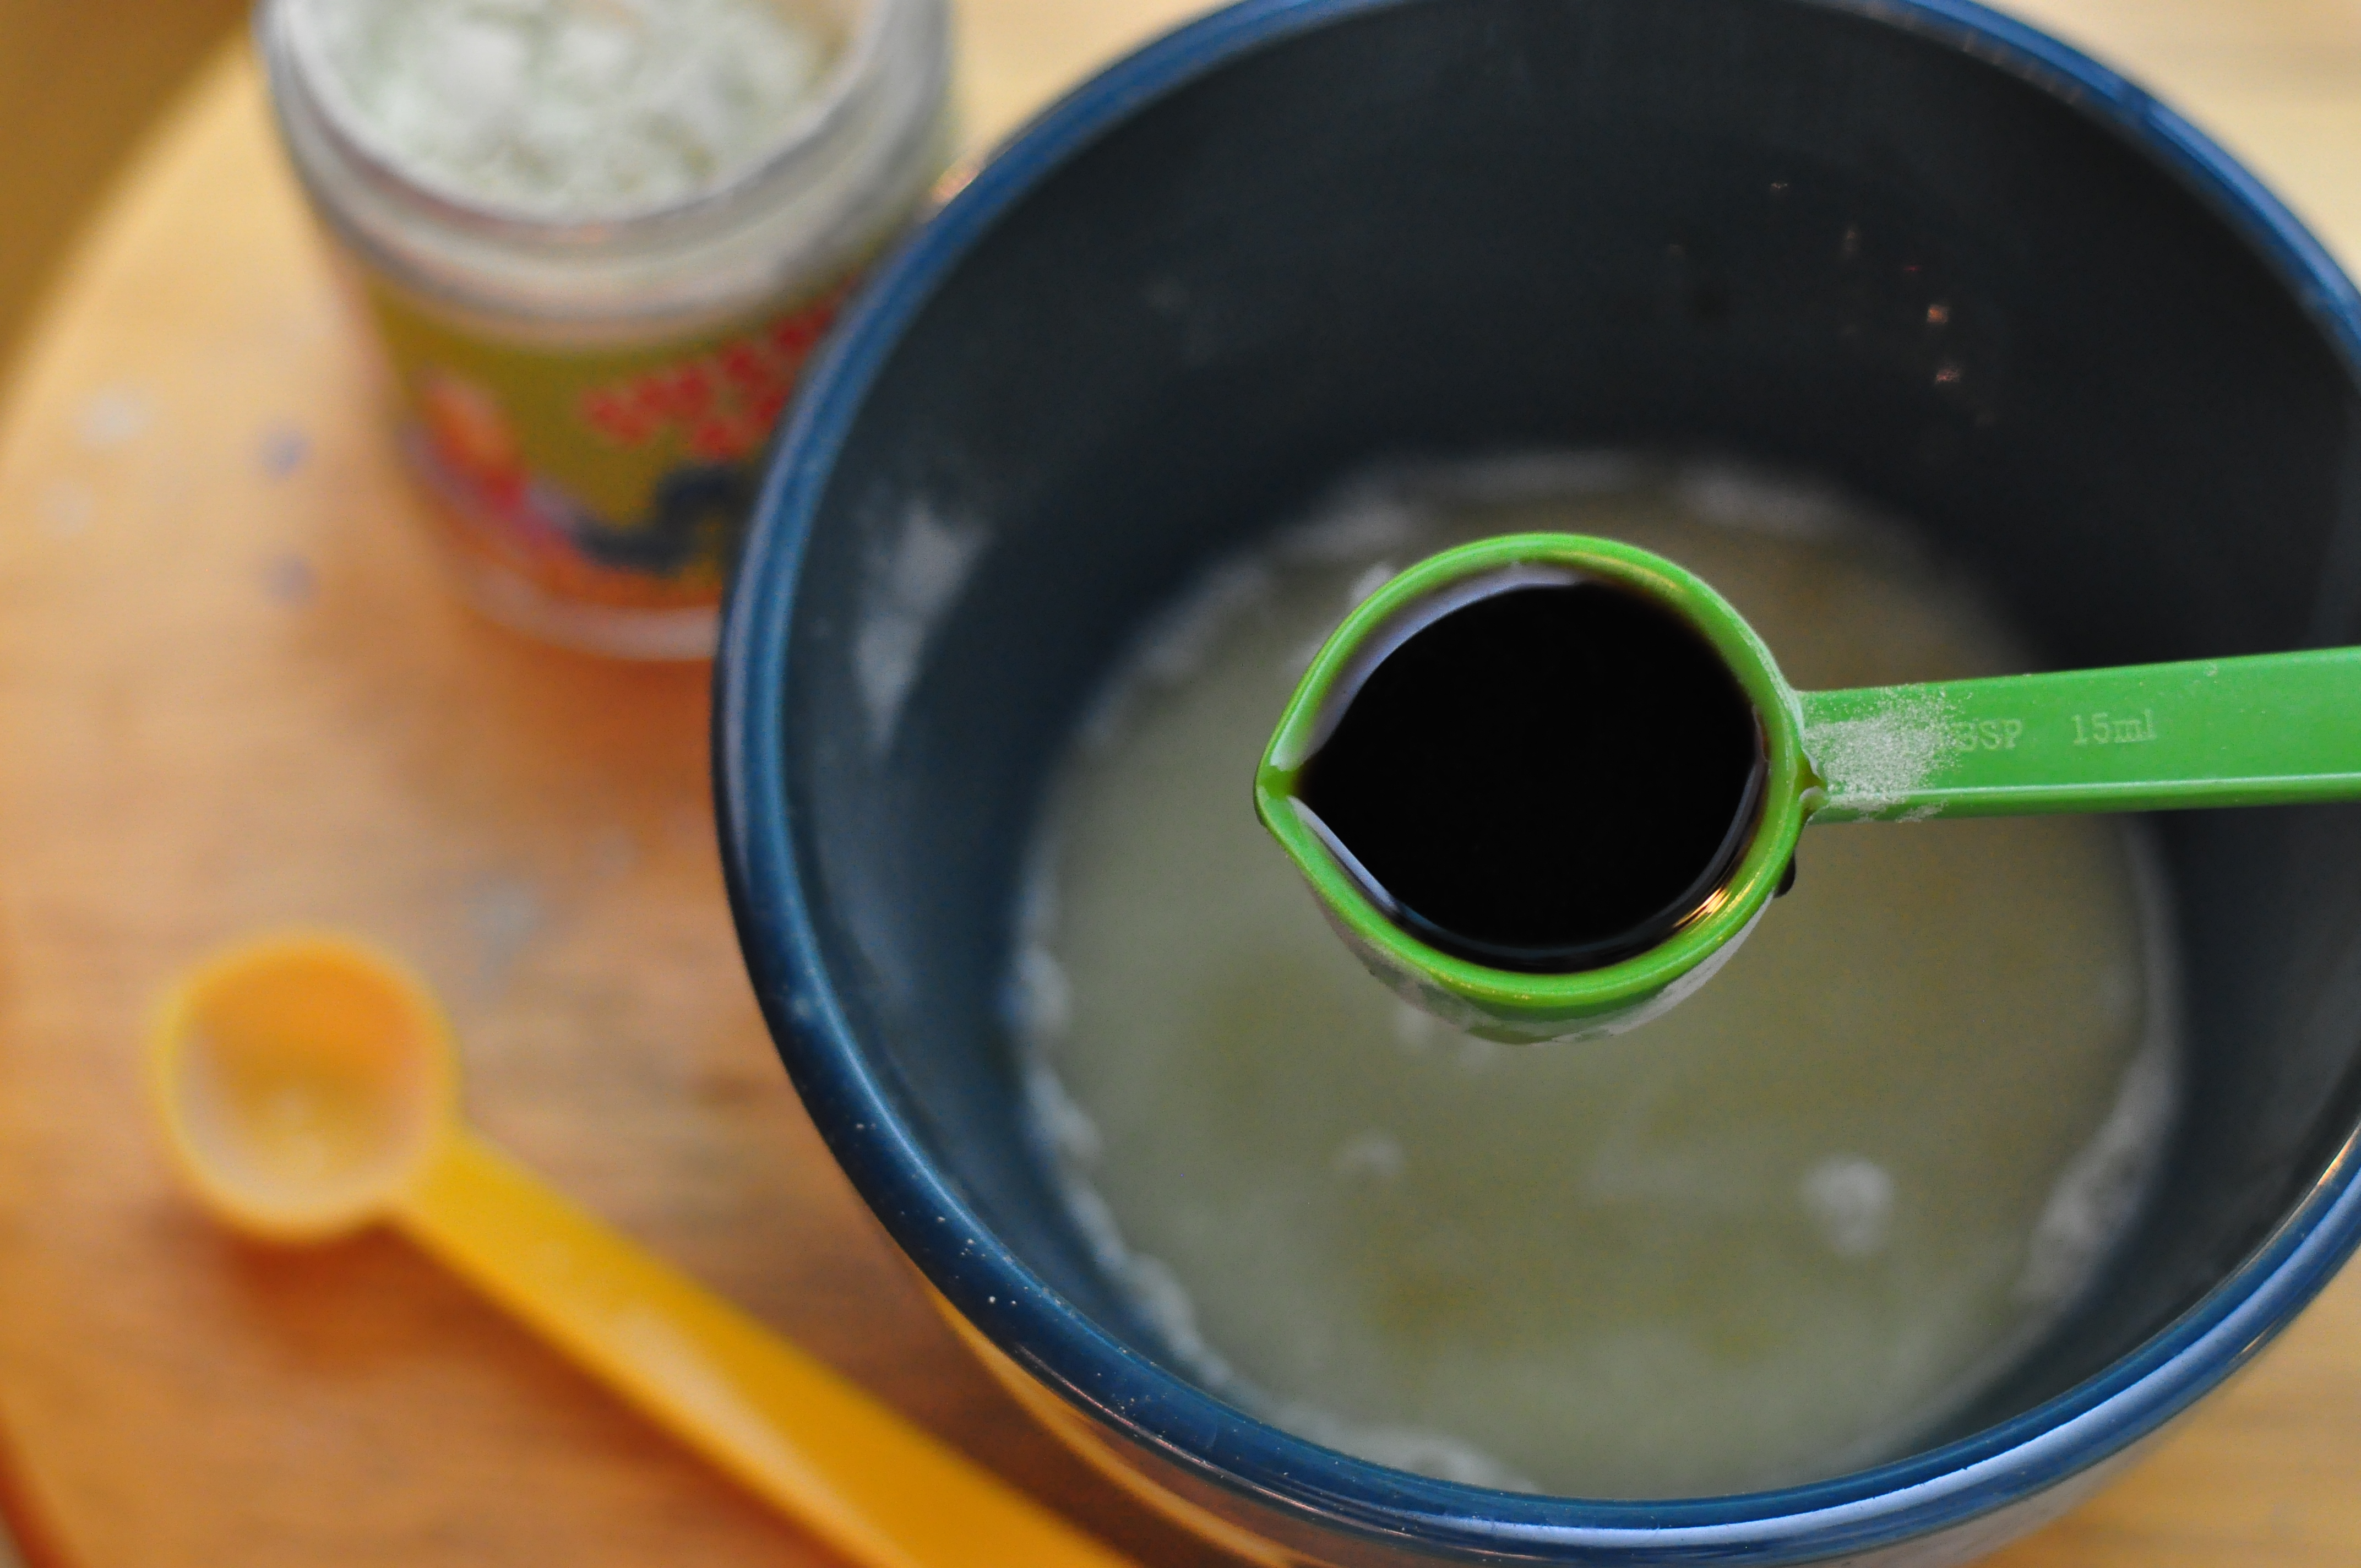
Every 10 minutes I deglaze the pan.  It’s up to you what you want to use–oil, vinegar, wine, water.  I just used water.

DSC_0132_01

While your onions are doing their thing get everything else ready.

DSC_0130_01

Roast your peppers, you can do it on the stove or in the oven.  On the stove or under the broiler is the fastest.

DSC_0133_01

Just make sure your skins are most, if not all the way black.

DSC_0139_01

20 minutes in, deglaze your pan if needed.

DSC_0134_01

Wipe or rinse of your skins.

DSC_0156_01

And slice.  Dice your serrano or jalapeno peppers if you’re using them.  Or you’ll pay for it.

DSC_0165_01

30 minutes in.  This is the bare minimum for caramelizing onions.  You could go all day with these beauties and they will only get more delicious.  But you do have to eat eventually, and I can only plan for a meal an hour or so in advance.

DSC_0144_01

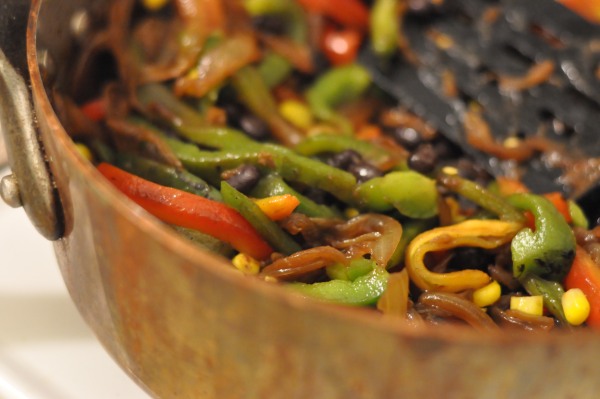
Add your peppers, beans, and corn to your onions and toss around to warm everything.

DSC_0168_01

Get your toppings ready.
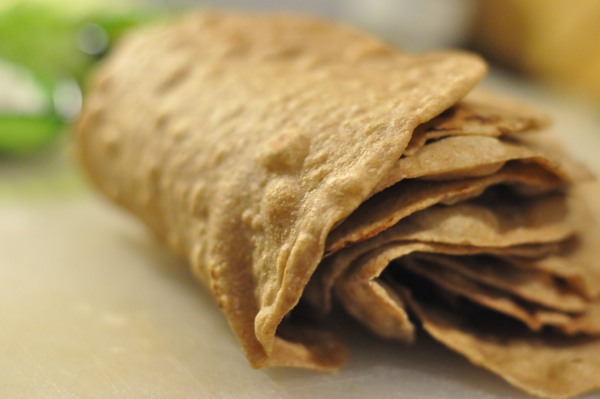
DSC_0175_01

And your tortillas.

DSC_0191_01

I love Greek yogurt and find it’s one of those things that is well worth the extra cost.

DSC_0198_01

Fixins.

DSC_0199_01

I decided to be cheap and buy iceberg lettuce.  Never again, once you grow accustomed to eating dark leafy greens you’ll wonder why the fuck this stuff even exists.

I’m sorry iceberg but it’s true, you’re a superfluous vegetable.

DSC_0200_01

The End.

Whole Wheat Protein Tortillas

DSC_0179_01

Tortillas are one of those things that once you make them, you’ll wonder why you haven’t all along.  I’ve been a loyal Mission girl since I knew what a tortilla was so I’m issuing myself some authority on tortillas.

13348138

These tortilla shells are obviously not the soft white flour tortilla shells of Mission, dare I say they’re better.  I do dare say.  I was convinced Justin was going to hate these and he loved them.  Side note: when Justin and I first met he was your typical college guy and hated pretty much all things healthy.  Now he’s salivating over a whole wheat soy tortilla.

Ladies, Cosmo was right, you can change your man.

Recipe: (makes 12) NutritionLabel (1)

1 1/2 cup whole wheat flour
1/2 cup soy flour
1/2 tsp salt
1 tsp baking powder
1 tbsp oil
3/4 cup water

Add your flours, oil, salt, baking powder to a bowl.

I’m adding soy flour here because I wanted to up the protein of the tortillas.  Soy flour has 10 g of protein per 1/4 cup compared to whole wheat’s 4 g.  The rule is you can replace up to 30% of your flour with soy flour and not run into problems.  You can do all whole wheat if you want but I find using solely whole wheat in any dish makes it too dense.  If I didn’t use soy flour I would have used all purpose.

DSC_0140_01

Mix together and add your water until it comes together.

DSC_0141_01

Turn out onto lightly floured surface and knead for 5 minutes.

DSC_0151_01

It won’t get elastic like a bread dough due to the lack of yeast.

DSC_0152_01

Portion into 12 equal balls. If you want to do tacos 12 is good.  If you want burritos, consider doing 8.

DSC_0153_01

Cover with a damp cloth or paper towel so they don’t dry out.

DSC_0154_01

Lightly flour your surface and flatten out ball with your hand.

DSC_0159_01

Roll out the rest of the way with a rolling pin.

DSC_0160_01

Mine were about 6 inches.  Cover back up with a damp cloth until you have made all the tortillas.  I stacked mine on top of each other and didn’t have a problem with sticking.

DSC_0164_01

Heat a skillet over medium-medium/high heat.  I didn’t bother with oil.

Heat the tortillas for 30 seconds on each side.  You’ll start to see bubbling.

DSC_0172_01

DSC_0173_01

I found these tortillas good enough to eat on their own, which is something I would never do with store bought tortillas.  I also realized how plastic-y the store bought ones taste after sitting in those bags for so long.

DSC_0188_01

We enjoyed ours as Vegetarian Fajita Tacos.

DSC_0205_01

Adventures in Bread Making: Multi-grain Dutch Oven Bread

DSC_0334_01

Fucking-a I love bread.

I love everything about bread.
I love smelling it.
I love looking at it.
I love hearing that sexy crackle the crust makes.
I love buying it from pretentious little hipster markets.
Everything.

I spent a good 1/2 hour taking pictures of this beauty not because I couldn’t get a good shot, but because it was that gorgeous.

Okay enough about bread.  What am I saying?  You can never talk about bread too much.

What inspired this bread?  I don’t know, I like throwing a lot of things together and I hate recipes, hence my Multi-grain bread was born.

Recipe:

1 cups bread flour
2 cups whole wheat flour
1/2 cup oats (old fashion)
2 tbsp quinoa
2 tbsp flax
2 tbsp sunflower seeds (raw)
2 tbsp pumpkin seeds (raw)
1 tbsp milk powder (milk powder)
1 1/2 cups water + 1/2 cup for proofing
1 1/2 tsp yeast (active dry)
1 1/4 tsp salt
4 tbsp applesauce (no sugar added)
1 tsp sugar
oil for coating

Lightly process or blend your oats, flax, sunflower seeds, and pumpkin.  Be careful not to turn them into a powder.  You can use any combination of hard grain/seeds you like or have on hand.  These are just the ones that sounded good to me at the time.

DSC_0220_01

Add your blended mixture to a boil with your quinoa.

DSC_0221_01

Boil your 1 1/2 cup water and add it to your mixture.  Let sit for about 20 minutes.

DSC_0222_01

Until it looks like this.

DSC_0233_01

Now heat your 1/2 cup proofing water to 110° and add it to small bowl with your yeast and 1 tsp of sugar.

DSC_0223_01

If it doesn’t look like this after a couple minutes I just start over.  You want happy yeast.

DSC_0232_01

While your yeast is finishing proofing you can start adding the rest of your ingredients to your mixer or a mixing bowl.  Applesauce, salt, flours, milk powder, porridge concoction.  I say milk powder is optional.  I’ve forgotten to add it a couple times to random recipes and I haven’t really noticed a difference, but if you’ve got it why not use it?

Get this started mixing and then add you yeast.

DSC_0235_01

Make sure they don’t get too happy on you.

DSC_0234_01

Mix on a lower speed until it just comes together.  This will be a wetter dough because of the porridge business we added.

DSC_0251_01

Turn out onto your work surface and do the kneading thing.  Again, because this is wetter to start don’t be afraid to add flour during your kneading.  I alternate between bread flour and whole wheat during my kneading if I find I’m using a lot.

DSC_0254_01

Because there are so many goodies in this dough it’s going to be near impossible to do the window pane test to determine kneading completion.  So just kind of knead it until it becomes a tighter, smoother ball.  As I’ve said before it is ridiculously hard for one to over knead a dough at this stage, so don’t worry about it.  Bread kneads lots of attention at this stage, give it some.  ← Ha!

DSC_0255_01

Lightly oil this beauty and put it back in your mixing bowl.  Cover in a warm area for 1 hour.

DSC_0262_01

You know your bread will be good when the dough looks good enough to eat.

DSC_0296_01

Punch it down.  Punch it down all over.

DSC_0297_01

Form it back into a ball.  Tucking the sides under and in and smoothing out the top with your hand.  As you would a doughnut or bagel, just a really big one.  Top with some whole wheat flour and place on a sheet of parchment paper.

If you don’t want/can’t make this in a dutch oven just divide the dough in two and make it normally as you would a sandwich loaf.

DSC_0300_01

Let rise for 1 hour.

DSC_0302_01

Near the end of your breads rising time preheat your oven to 425° with your dutch oven (and lid) inside.  The dutch oven need to reach 425°, so don’t start preheating too late, about 30 to 40 minutes in.

DSC_0303_01

Score your bread to encourage even expansion.  You want to make even, clean cuts about 1/4 inch deep.

I found this article on scoring helpful and the bread pictures are pretty.

DSC_0307_01

When your oven has reached 425° carefully remove it and gently place your bread inside.  Do not drop it in or you’ll partially ruin your rise.

DSC_0318_01

Bake for about 15 minutes with the lid on.

DSC_0323_01

Bake for another 15 with the lid removed to darken the crust.

DSC_0324_01

Allow to cool on rack for 30 minutes (remove paper).

DSC_0335_01

Enjoy!

DSC_0348_01

Saag (kind of)

DSC_0392_01

Well, this is my version of it anyway.  Saag is one of my favorite things to order at Indian restaurants and Indian food is one of my favorite things to indulge in when we go out to eat (that or Sushi).  The problem with Saag, at least for me, is you never just want Saag.  It’s not a dish that makes much of a meal.  Even if you get the Saag Paneer or Saag Aloo.

So this is a bastardized version of Saag.  And by bastardized I mean, it’s got a whole bunch of crap thrown into it (garbanzo beans, potatoes, tofu) and it’s healthier.  I’m sorry food traditions of India, I just can’t help myself sometimes.

I put a decent amount of heat into this dish because one time a waitress misunderstood me and thought I wanted my Saag extra spicy instead of my vindaloo.  It turned out to be delicious but I payed for it later.

Recipe:

1 onion (diced) 
16 oz spinach
16 oz mustard greens
1 block extra firm tofu
2 oz ginger (about 2 in chunk, diced) 
3 medium white potatoes (1 inch cubes) 
5 garlic cloves (diced) 
1 cup dry garbanzo beans (OR 2 cans) 
2 tsp whole cumin (ground)
1 tbsp curry powder
1 tsp cayenne (optional)
1 dried pepper (optional, I used dundicut)
1/2 cup water
1/2 cup greek yogurt (I used 0%)
salt
2 tsp olive oil + 1 tsp olive oil

Make your beans, or if you’re using canned you’re all set with that.

Cut your tofu in half long ways and place paper towels above and below and top with a weighted plate or baking sheet.  This removes excess water and makes the tofu denser.

DSC_0321_01

Bring a pot of water to boil for your potatoes and prep them.

DSC_0355_01

While your water is coming to a boil prep your other ingredients.

DSC_0362_01

Your water should now be boiling so add your potatoes and parboil them.  They should be done after about 3 minutes.  You want the edges to start looking translucent while the center is still white.

Rinse your potatoes under cold water (this ensures they won’t turn to mush when we fry them and it washes off residual starch).

DSC_0358_01

Dry out your potatoes (I use a salad spinner) and coat them with your 1 tbsp curry and 1 tsp cayenne.

DSC_0359_01

And fry them up with your 2 tsp oil.  Near the end of their cooking time you can add the tofu to start giving that some flavor, but you don’t have to.

When they’re done remove to a plate and set aside.

Lightly salt here.

DSC_0360_01

Over medium low heat add your other 1 tsp oil, garlic, ginger, dried pepper (if using) and onion to your final cooking pan.  Cook for at least 15 minutes to get it to that toffee color, do not let it burn.

Lightly salt here.

DSC_0364_01

While your onions are doing their thing you can start cleaning your greens.  If you’re using frozen (which you can, in fact it will make the dish faster and easier to cook, but who needs that?) then ignore these next few steps.

Fill up your sink with cold water (clean it first, duh) and dump your greens in there.  Swirl them around then let the gunk settle.

DSC_0354_01

Remove them to a bowl and for a brief second be excited you decided to go with fresh greens.

DSC_0369_01

Then look at your sink and be happy you listened to me about cleaning them this way first.

DSC_0357_01

Now chop your greens.  This part is a bitch, I’m not going to lie.  But seriously, how pretty does that look?  Don’t forget about your onions.

Mustard greens are more bitter than spinach.  If you want you can use all spinach, the mustard greens at the store just looked so fresh I couldn’t resist and I love me some mustard greens.

DSC_0371_01

Now back to your onions.  See?  Toffee color.  Do not try and rush this process by cooking it at a higher temperature, the onions will not like you for that.

After this 15 minutes has passed add your cumin and cook for another 5.  Deal with it, if you wanted fast Indian, go to a restaurant.

DSC_0372_01

Now add your greens.  You don’t want your greens to be dry, so don’t put them through a salad spinner or anything.

DSC_0376_01

Increase your heat to medium and add your 1/2 cup of water.

Lightly salt here.

DSC_0378_01

Now here’s where I followed an incorrect recipe.  It told me 5 minutes would be a fine enough time to cook my greens down.  5 minutes is not enough time and does not give you that creamy Saag texture.  Simmer your green for at least 20 minutes with the lid on, checking regularly for water level.  You don’t want it to be soupy and you don’t want it to be dry.

After 20 minutes add your beans, potatoes, and tofu.  Simmer for another 5 minutes with the lid off.

DSC_0380_01

Now because I did the 5 minutes instead of the 10 I had to cook it longer so my tofu broke up.  It still tasted delicious but just something to keep in mind.

DSC_0386_01

Now you can add your 1/2 cup greek yogurt if you want.  It’s not traditional in Saag but because we use so much less fat it helps up the creaminess a little.  If you do decide to use it turn off your heat and temper your yogurt.  Do this by adding small spoons of your warm Saag to a bowl with your yogurt and stir.  When the yogurt has warmed up add it to your pot and turn the heat back on to a low simmer for 5 minutes.

This is ready to eat now but, like foods of a similar fashion it’s much better the longer you let it stew.

DSC_0388_01

Serve by itself, with rice, or in a Whole Wheat Pita pocket!

DSC_0404_01

Adventures in Bread Making: Whole Wheat Pitas

DSC_0279_01

I finally got around to making pitas!  I had dragged my feet with it because I get a pack at the store for a $1 or so and I thought they tasted pretty good.  And then I made these and realized, holy shit I’ve never had a fresh pita before–the veils that get lifted from your eyes a quarter of the way through your existence, don’t even get me started on how easy it is to actually make a risotto.

I can’t tell you how many pita recipes I came across that didn’t have sugar in them.  Actually I can, because I passed kindergarten.  It was three.  Three!  Three popular bread recipes not containing sugar, spouting how healthy it is and…whatever.  It’s fucking bread people.  It has yeast, yeast needs sugar.  Put sugar in your fucking bread recipes.  And also, it’s bread.  It’s carbs.  If you’re so concerned about that I don’t know, eat a salad and be sad.  Stop fucking with bread.

I’m sorry I’m just really passionate about bread.

That being said, I dick around with recipes.  Mostly because I have a complete inability to follow even the most simple recipe.  So now I’m telling you to follow mine.  Still with me?  Coolio.

Recipe:

1 1/2 cup whole wheat flour
1 1/2 cup all purpose flour
1 1/4 tsp salt
1 tbsp olive oil
1 1/2 cup water (warmed to 110°)
2 tsp honey
2 1/4 tsp yeast

Proof your yeast. I always proof my yeast in a separate bowl before I add it to my flour regardless of what a recipe says. What if you screwed up the temperature and cooked your yeast, what if your yeast is old, what if you don’t know how to use a measuring spoon properly and pour half the bottle in? Then you’ve just wasted a decent amount of flour, and that’s sad and avoidable. Mix 1/4 cup of your warmed water with your honey and yeast. Gently. Yeast are sensitive creatures.

DSC_0198_01

1 minute in.

DSC_0199_01

A couple minutes in.

DSC_0200_01

As soon as I start to see my yeast buddies munching and gurgling I start prepping all my other ingredients.  Flours, oil, salt.

DSC_0201_01

And your water.  I warm all of my water to the yeast’s ideal temperature.  I figure it makes the yeast extra happy and they pay you back for it later.  I only do nice things if I get something in return, yeast are no exception.  I stir that around a couple times.

DSC_0202_01

And this is what my happy yeast friends have turned themselves into.

DSC_0203_01

Now add them to your dough.

DSC_0204_01

And mix until it pulls away from the bowl.  Oh I forgot to say we’re making this without a mixer.  Fancy!  No, I just prefer making bread by hand.

DSC_0205_01

Flour your surface.  I prefer my dough to be stickier when I start with it on the cutting board and to work more flour into it during the kneading process then to have it be good to go and worry about drying it out.  If that idea freaks you out or you read somewhere from some bread expert that that’s wrong then do 1 1/4 cup water total to the recipe.

DSC_0206_01

Pour your dough out onto floured surface.

DSC_0207_01

Knead for 5-10 minutes until it’s not a sticky mess.

DSC_0208_01

Then cover it with your mixing bowl and walk away for 20 minutes.

DSC_0213_01

Oooh, look how happy it is.

DSC_0214_01

Knead for another 5-10 minutes, this is when you want to get that elasticity.  Check for some window pane action, it’s a little harder to achieve with whole wheat based breads but as long as the bread looks like it’s trying to make one that’s fine.  Also, it’s hard to take a picture of dough window pane with one hand, so no picture for you.

DSC_0215_01

Rub down with some oil and put it in a bowl to rise, yes I put it back in my dirty mixing bowl.  I’m not a man, I don’t do dishes.  Dishes is men work.

DSC_0217_01

Cover with saran wrap AND a towel and let rest for 1 hour or until doubled in size.  I used to think it was unnecessary to use saran wrap but it really seals in moisture.  Look who doesn’t practice proper stove safety.

DSC_0219_01

1 hour.

DSC_0226_01

Punch it down.  That seems pointless.

DSC_0227_01

There we go.

DSC_0229_01

Turn dough back out onto your work surface and separate into 8 equals portions.  My dough started out at 28.2 oz, so each pita dough ball weighed about 3.5 oz.  If that is in fact what those random numbers on my recipe sheet meant.  Roll them into balls as you would bagels, tucking the sides under and in, smoothing the tops with your palms until they’re taut.

Put onto a baking sheet and cover with a damp cloth.  We’re talking damp, not dripping, not random wet spots here and there, damp.  You don’t want to risk your dough drying out.

Let rest for 20 minutes.

At this point you want to start preheating your 500° oven with your cooking pan in it.  I used my cast iron pan.

DSC_0241_01

Lightly (LIGHTLY) dust your work surface with whole wheat flour and gently press your dough balls out into pita size.  1/4-1/8 thick, I didn’t bother to measure, that’s just what everyone says.

I did not roll my pitas out with a rolling pin.  I know you’re not supposed to that with pizza dough, so I figured the same reasoning applied.  It’s too violent of a process for the dough at this stage.  Remember, yeast are fickle creatures so anything that arises from their bodily functions will be much the same.

Lightly (LIGHTLY) sprinkle with whole wheat flour on top to give them that homemade rusticyness vibe thing.

Make all your pitas and let rest for 10 minutes, covered with your damp cloth.

DSC_0263_01

Place one pita dough at a time on your cast iron or whatever oven safe thing you have and bake for 3 minutes.  Transfer to a wire rack to cool and repeat.

Okay these three pitas have information for you.

Top Left Pita: “Jenn read somewhere that you should lightly spritz your cast iron with water and close the oven door to create steam in your oven.  She did this, but failed to let the oven get back to 500°.  I was  baked at 450° and so my pocket didn’t get big, this made me sad and wish Jenn wasn’t so impatient.”

Top Right Pita: “I was one of the last pita doughs Jenn flattened but then the second one she baked, so I didn’t get to rest as long as the others, so my pocket wasn’t well formed.  This made me sad and wish Jenn would pay more attention.”

Bottom Pita:  “Jenn got her shit together with me.  I was rested for 10 minutes after my formation and baked in a 500° for 3 minutes.  My pocket was well formed and this made me happy.”

DSC_0264_01

6 happy pitas and 2 not so happy ones.  Don’t worry they found their home as a dip implement.

DSC_0286_01

Italian Pasta Salad

DSC_0029_01

Pasta salads’ awesomeness lie in their versatility.  That’s one of the main things that usually attracts me to a dish because I don’t have the budget right now to buy fancy ingredients so I just buy the same staple ingredients and rework them in different ways.  The only ingredient in this dish that wasn’t already in my kitchen was the fresh asparagus.

I used to make pasta salad all the time in college, you know with the Salad Supreme Seasoning.  It immediately takes you back to a time of summer family get togethers filled with people you don’t know and time spent figuring out if you are in fact blood related.

1001029_052100005539_A_400

Oh the memories.  This stuff tastes like crap by the by.  Move on from it.

Recipe:

16 oz pasta
2 tomatoes (chopped–I used roma)
1 green pepper (chopped)
1 asparagus stalk (blanched)
2 tbsp kalamata olives
1 can garbanzo beans (rinsed)
1 corn ear

Dressing:

1/4 cup red wine vinegar
1 lemon (zest, juice)
1-2 tbsp olive oil
1/2 tsp salt
1/2 tsp sugar
1/4 tsp onion powder
1/4 tsp pepper
2 garlic cloves (crushed)
1/2 tsp oregano (dried)
1 tsp basil (dried)
water to fill up to 8 oz

Make your dressing.  You can use store bought dressing if you want, I just figured I had the ingredients to make it myself.  Add more oil if you like, mine is super “light” compared to even most of the light versions you buy at the store.

DSC_0001_01

While your dressing is getting happy start boiling your water for your asparagus and noodles.

Start prepping your veggies.  Clean your asparagus and remove the woody ends.  I like the snapping method.  I snap all of them instead of snapping one and using the one as a guide to cut the others.  Mostly because I think the snapping is fun but also because others snap farther up the stem anyway.

DSC_0002_01

DSC_0003_01

If you want to peel your asparagus to make it prettier I think you’re silly.  It’s fine looking asparagus just as it is.  But it’s also your asparagus.  Add your asparagus to your boiling water for 2-3 minutes then rinse under cold water to halt the cooking process.  You can add your corn with your asparagus because they take the same amount of cooking time.

DSC_0005_01

Clean the goop out of your tomatoes.  Leaving the skin on is optional, we like tomato skins and I hate peeling them so it’s a win win.

DSC_0008_01

Pour your dressing over your veggies and let them all get happy together.

DSC_0019_01

When your asparagus is done cut and add it to your mixture.

DSC_0020_01

Add your corn.

DSC_0025_01

When your pasta is done, rinse under cold water.  Be sure to cook your noodles al dente as they will soak up the remaining liquid in your mixture and continue to soften.

DSC_0024_01

You can serve this dish immediately, but it’s best to put it in the fridge for a couple hours to let the flavors get happy.

DSC_0026_01

I served it with some chopped spinach and Parmesan cheese, enjoy!

DSC_0046_01

Sunflower Cashew Pesto

DSC_0046_01

I love pesto, but it can be expensive.  Usually things are cheaper if you decide to make it yourself–pesto is not one of those things.  Pine nuts are expensive, then you have to use fresh basil, then you need fresh Parmesan if you want cheese.  I’m a cheap ass and all that is already too much for me.  One day I had a craving for pesto and decided to be stupid and buy the kind in a jar.  Big mistake.  For one, most of them have a ridiculous amount of fillers.  I bought one that had as few ingredients as possible and it tasted like cheap oil.  It was my fault.  You shouldn’t expect fresh taste from a jar that you didn’t jar yourself.

So on my second pesto attempt I decided, fine, I’ll compromise.  This pesto uses sunflower seeds and cashews instead of pine nuts, which are a whole lot cheaper.  Even cheaper if you just use sunflower seeds.  You can use any nuts you have on hand–walnuts, pecans, almonds, pistachios–this recipe is open to experimentation.

To see the blended version go to Sunflower Cashew Pesto (part 2).

Recipe:

2 cups fresh basil (30 g, can use up to 60 g)
2-4 cloves garlic
1/4 cup sunflower seeds
1/4 cup cashew seeds
1/2 tsp salt
1/2 lemon (juice)
2 tbsp olive oil

Soak your cashew nuts and sunflower seeds for at least one hour, you can even do it overnight but I never plan that far ahead.  This is a step you shouldn’t skip.  Do a little experiment.  Try a seed/nut before you soak and after, notice the flavor difference?  Magic!  Or science, whatever.

DSC_0005_01

Near the end of your soaking time, turn your attention to your basil.  I’m only using 30 g because I’m using basil that I grew myself (I’m not bragging or nothing) and that’s all my plant had to give.  If I had had more I would have used it, up to 60 g.

DSC_0007_01

Now here’s where you have a decision to make.  I decided to not use a food processor (mostly because I don’t own one) or a blender because I wanted this recipe to be accessible to those who don’t own such appliances.  I thought to myself, people have been making pesto long before such appliances existed so why not give it a shot.

Because we’re not using an electronic device to mince our basil we want to cut it as finely as possible.  I start by doing a chiffonade, which is stacking a few leaves on top one another, rolling them tight like a cigar, then cutting them in strips.  From there I mince.

DSC_0016_01

Chiffonade all your basil and chop your garlic.  Start with 2 cloves and add more later if you want it more garlicy.

DSC_0017_01

Juice half a small lemon onto your basil leaves to prevent browning.

DSC_0021_01

Combine your garlic and basil, mincing.

DSC_0022_01

Rinse your seeds/nuts.

DSC_0024_01

Add them to your basil/garlic chopping as you did before.  If you only have 2 cups of basil and you don’t want it to be as nutty as mine then consider only using 1/4 cup total of sunflower seeds/cashew nuts.

As you’re chopping here add 1 tbsp of olive oil.

DSC_0025_01

Near final product.

DSC_0027_01

I took about 1/3 of my chopped mixture and added it to my mortar and pestle and mashed it with 1 tbsp of oil to cream up the final mixture a bit.

DSC_0028_01

Reincorporate your mashed mixture with your chopped.  I don’t add that much oil in my pesto mix because I like to add it in later, up to you though.  Salt to taste.

As for serving I added about half of my pesto mixture to some sauteed mushrooms and spinach, 8 oz noodles, 1 oz Parmesan cheese, and drizzled it with olive oil.

DSC_0050_01

DSC_0053_01

And the next day I put it in an omelet with some Parmesan cheese, spinach, and sun dried tomatoes.

DSC_0083_01

Avocado Pizza

DSC_0080_01

I’ve been on an avocado kick lately.  Putting them in salsas, burritos, salads, whatever.  So when I went to use the rest of my Whole Wheat Pizza Dough I though what the hell, let’s put some avocado on it.  If that doesn’t sound appealing to you then check out my Apple Goat Cheese Pizza that I made with the other half of my dough.  And if that doesn’t sound good, I don’t know, stop reading this blog.

Still reading?  Fabulous.

I don’t really have a reason as to why I used the ingredients I did.  Other than the fact that they were in my fridge and they sounded good.  I think I was going for a salsa on a pizza.  I’m not really sure how the Kalamata olives found their way on there.  But they were delicious so I wasn’t mad about it.

Recipe:
Baking time: 8-10 minutes

1 cup cherry tomatoes (about 8, sliced thin)
1 avocado (sliced thin)
2 oz goat cheese
12 kalamata olives (chopped)
1 tbsp lime juice
2 tsp oil
1 tsp cilantro (or 1 tbsp fresh)
1/8 tsp cayenne
1/2 tsp cumin (ground)
1 garlic clove

Preheat oven 450°

Start with your dough on a lightly floured surface.

DSC_0031_01

Gently stretch it out into a circular shape.  Do this whatever way you find easiest.  I do the hang and stretch a lot.

DSC_0067_01

DSC_0041_01

Crush your garlic with lime juice, oil, and spices.

DSC_0074_01

Rub all over your dough.

DSC_0076_01

Now decorate your pizza, doesn’t really matter how.  I got a little silly with it.  To read about how I cut an avocado click here.  It’s not a genius method or anything, I just find it safer than a lot of methods you find.

DSC_0078_01

Bake in your 450° oven for about 8 minutes or until golden brown.

DSC_0079_01

The avocado kind of gets the consistency of a hard boiled yolk.  Some may not enjoy that.  I thought it was lovely.  I’ve been kind of enjoying unconventional pizzas over the traditional lately.  Anybody can knock out a cheese pizza and hell, you can buy one pretty much on every corner.  Avocado pizza?  Not too many places selling that.  And I know there’s a smart ass who just thought, “Yeah, probably because it sucks.”  Enjoy your life of snob misery judgmental internet viewer, I’m going to enjoy my avocado pizza.

DSC_0093_01

Pumpkin Pancakes

DSC_0082_01

Because a day without pumpkin is a day without happy.

I think that’s all the intro these pancakes need.

Recipe: makes 8-10 pancakes

3/4 cup whole wheat flour
1/2 cup all purpose flour
1/2 cup pumpkin puree
1 tsp baking powder
1/2 tsp baking soda
1 egg
2 tsp oil
1 cup buttermilk
1/2 cup water
1 tbsp brown sugar
1 tsp vanilla
1/4 tsp salt
1/2 tsp cinnamon
1/4 tsp ginger
1/8 tsp nutmeg
1/8 tsp allspice
*or 1-2 tsp pumpkin/apple pie spice

Sift your flours, salt, baking powder/soda together or just prepare them for sifting.  I usually violently sift  them in my main mixing bowl at the end, but then again I enjoy a frantic lifestyle in the kitchen despite what my pictures may tell you.

DSC_0041_01

Add your egg to a mixing bowl.

DSC_0044_01

Separate the yolk and add that to another mixing bowl.

DSC_0045_01

In your yolk mixing bowl add your pumpkin puree, brown sugar, spices.

DSC_0046_01

Mix until just combined.

DSC_0049_01

In your white mixing bowl add your buttermilk and water, and whisk until frothy.  This will add some lightness to our pancakes, yes you can skip this step.  You are lazy for asking.

DSC_0047_01

That took 2 seconds and it’ll take 4 to wash the bowl out.

DSC_0048_01

Now add your flour on top of your yolk mixture.  Don’t mix.

DSC_0050_01

Then add your frothy mix.  Now you can stir.  About 10 seconds with a whisk should do it.

DSC_0051_01

Be careful not to over mix.  Mixture shouldn’t be too thick or too runny.

DSC_0052_01

Ladle out onto heated, lightly buttered pan.  I use a 1/4 cup measuring spoon to ladle out my batter and it’s the perfect size.

DSC_0053_01

Flip when small bubbles start to form.  We’re still having seasoning issues with our cast iron, the poor guy.

DSC_0063_01

Depending on your ladle size you should get about 8-10 pancakes.

Serve with some pecans or Pumpkin Granola!

DSC_0080_01

Healthy Wasabi Savory Granola

DSC_0022

Another savory granola you say?  Check out my other one — Healthy Coconut Curry Savory Granola here.  I love savory granolas and I don’t think people give them enough of a chance.  They’re just as versatile, I enjoy eating mine by itself or sprinkling it over a serving of rice.  I’ve paired this granola with some crystallized ginger chunks to give you some of that sweetness that seems to be  so necessary with most folks when it comes to eating granola.

Recipe:

3 cups oats (old fashion)
2 tbsp flax seed
2 tbsp sesame seed
1/2 cup almonds (raw, chopped)
1 tbsp whole wheat flour
2 oz crystallized ginger
1 tbsp wasabi powder
1 tbsp soy sauce
1 tsp ginger powder
1/2 cup water
1/4-1/2 cup wasabi peas

Baking time: 1 hour

Preheat oven 300°

Add oats, almonds, flax seed, sesame seed, and whole wheat flour to a mixing bowl.  Adding whole wheat flour gives the granola a little bit of stability.  It won’t make it chunky but it will make it so it’s a few oats stuck together with some of the ginger.  If you want it a little bit chunkier go up to 2 tbsp of flour and 1 egg white.

DSC_0002

Combine.  I added 1/2 of my ginger chunks before baking and 1/2 after.  The chunks I added before I cut smaller.

DSC_0003

In a small mixing bowl add your 1 tbsp wasabi powder to your 1/2 cup water.  I would say you could even go as high as 2 tbsp but Justin is a little more sensitive to heat than I am so I stuck to 1 tbsp.  This is the wasabi powder I bought because it was the highest concentration of wasabi I could find.  It wasn’t this expensive at the store.

DSC_0006

1 tbsp soy sauce.  I use the reduced sodium kind.

DSC_0007

1 tsp of ginger powder but you could definitely add more.

DSC_0009

Mix together.  Don’t forget to taste it, if it tastes too watery here then adding it to a bunch of oats will definitely not help the flavor.  Make sure the flavor is decently strong here.

DSC_0011

Pour into oat mixture and mix until there are no dry oats.  Mixture should clump in your hand.  Not as well as my other granola recipes but it shouldn’t be too dry.

DSC_0015

Spread and flatten onto lightly greased baking sheet.  I coat my hands with 1-2 tsp of oil and pat the top of the granola with these less chunky recipes.  I’m not sure what good it does but I tell myself it’s beneficial.

Bake in a 300° oven for 1 hour until the granola has a good crunch too it.  Toss whenever the ends start to brown faster.

Allow to cool and add additional ginger chunks and wasabi peas.  Store in air tight container.

DSC_0017

Enjoy by itself or with some rice and veggies!

DSC_0034